About a month ago I purchased an embroidery kit from TheCherryBlossomUS store on etsy to get a proper start with western style embroidery. I have done some limited embroidery in the past using only a backstitch to do outlines of geometric shapes on denim shirts. This was also several decades ago at this point.
This style of embroidery wasn’t specified but from checking with the V&A museum’s website on embroidery it appears to be “freestyle embroidery”. The kit provided all the materials needed and while the written instructions were a bit lacking, the seller had provided a link to video instructions that were extremely helpful. After a few stumbles using the written instructions I switched to following the videos and found that I was not doing several of the stitches properly. In general I prefer written instructions as I’m impatient but in the case of crafts, its better to see someone do a thing.
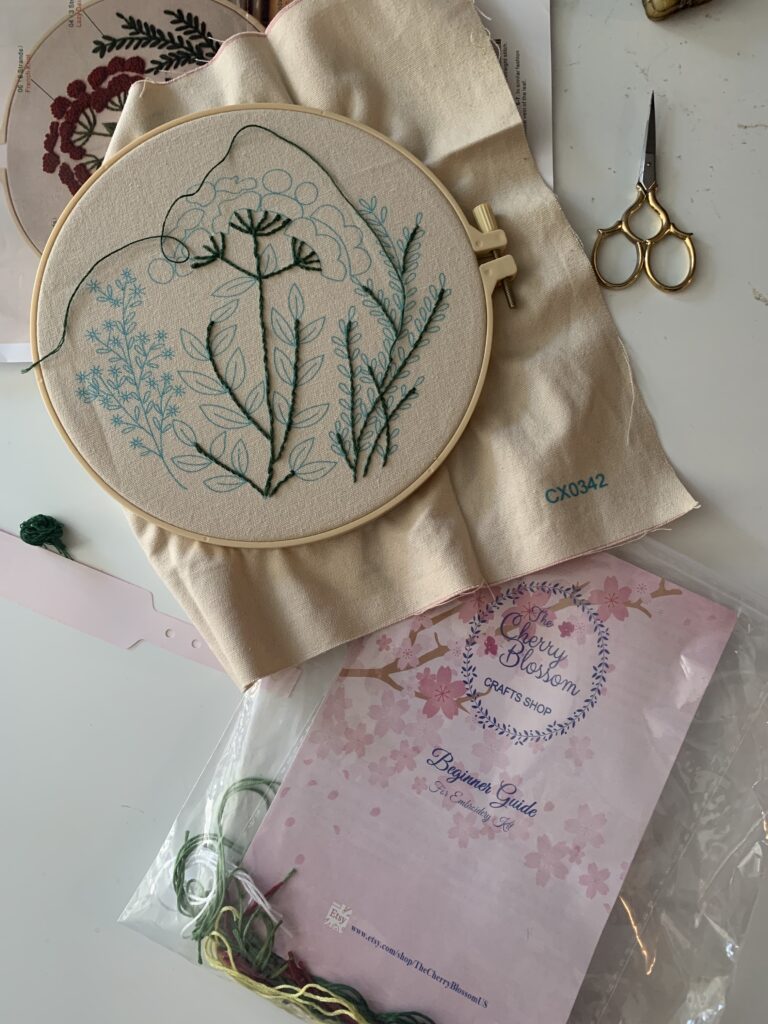
The first steps were to use an outline stitch to put in the branches of the plants. I did fairly well in this but didn’t read the instruction carefully and ended up using the wrong shade for the leafy stems on the right side of the project. The floss does come in subtle shades so its not very apparent but it did mean that I ran out of one color. The kit provided more than enough of each shade… provided you followed the instructions.
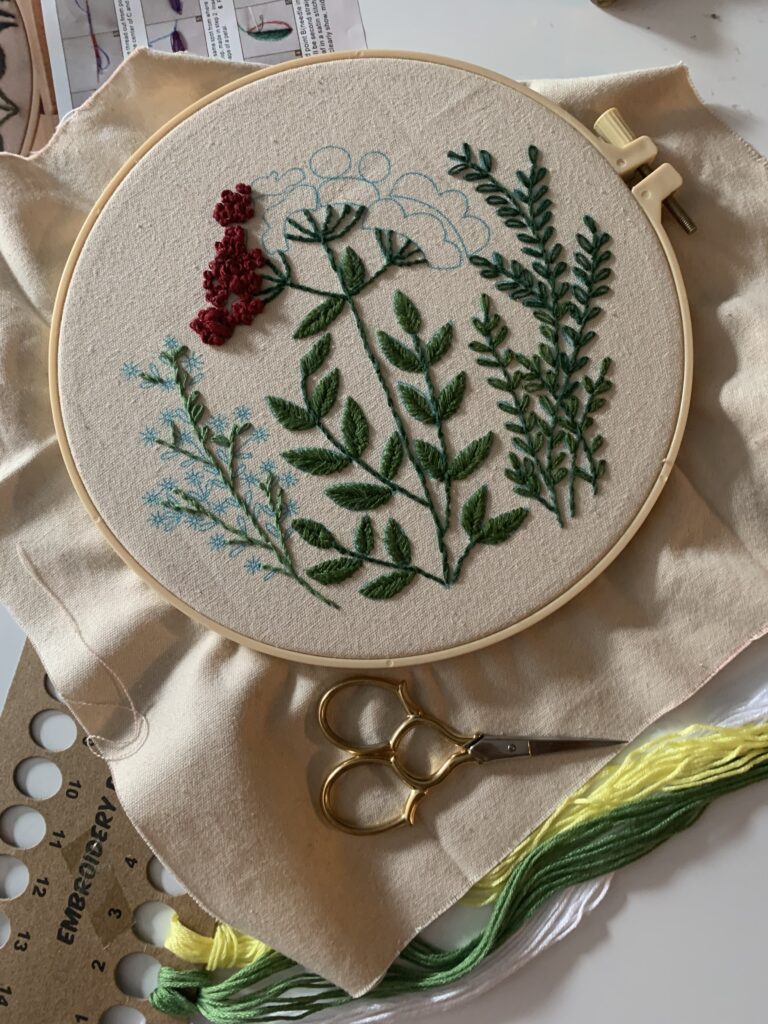 As I moved forward I had some issues with the techniques. I can see why people work on samplers so that they have to work through each new stitch to become familiar with it. And I suppose to rip it out and try again until they get it right.
Perhaps its due to my job as a software engineer where we iterate rapidly to improve a product but I tend to roll over mistakes, especially when I’m learning a new technique. My leaf stitch was terrible as I again relied on the written instructions rather than the video. I started at the wrong end of the leaf and did one side of the leaf then the other instead of alternating sides. As a result some of my leaves are misshapen.
Should I have pulled that work out and tried again? Maybe. I chose not to as this was a learning process and the most important part of learning is making mistakes and reminding yourself of them. As I’ve been knitting and crocheting for a few years I can feel when I make a mistake and then correct it as I’m going. This was the result of years of making mistakes and not seeing them until later when it was painful to correct (especially for knitting as I’m not very proficient in tinking). Sometimes the mistakes were so catastrophic that the entire project needed to be abandoned and entirely frogged out, usually resulting in a morass of matted yarn and an extremely excited cat in the middle.
Fortunately I learned how to fail. If there’s one thing that doing programming teaches you is that failure is unavoidable and should be embraced. Failure means that the problems are brought to the surface where they can be addressed. We use the term “fail forward” to describe the process of breaking things, finding out why it broke, and fixing it. On a project meant as a learning experience, show your failures and keep them as a reminder.
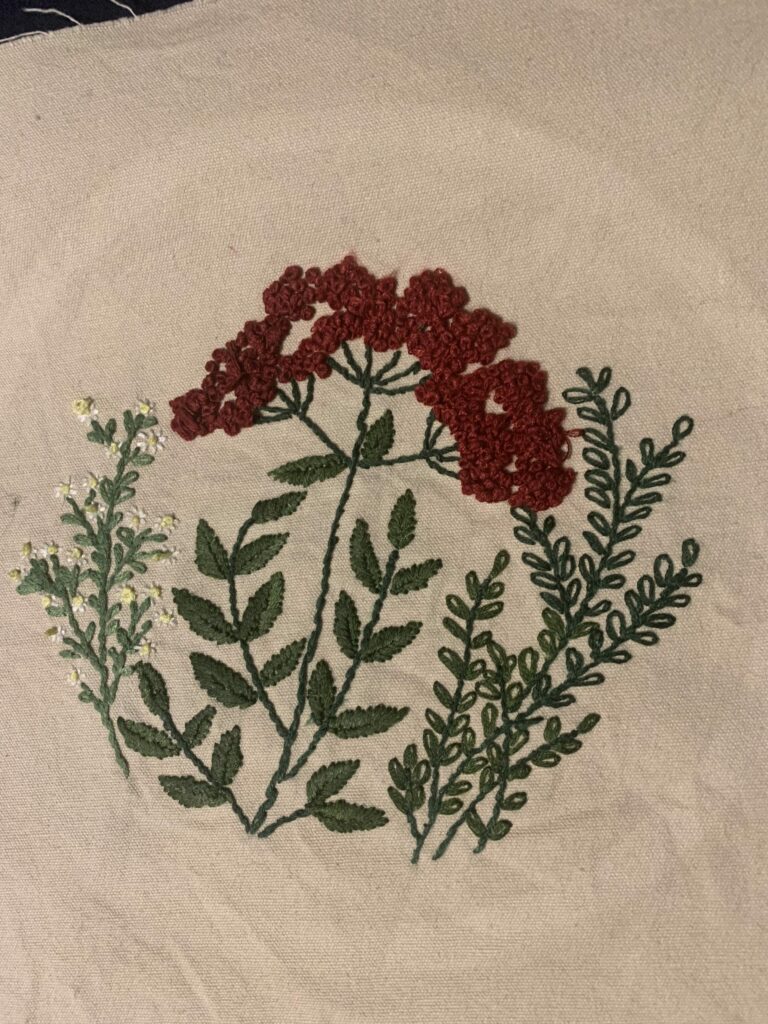
And the final work after washing out the water soluble pattern and kinda ironing it out. Its… adequate but it was a very good experience and the kit was well put together. I’ll keep it in a flat file for reference (reminder to self: label yo stuff on the back with the date) as I continue working on western embroidery.
My interest going forward is in Art Needlework from the Arts & Crafts movement and in thread painting (or silk shading). I believe both use a more restricted set of stitches but require more attention to detail. And patience. Lots of patience. This should be a challenge.